
Release Date: September 30, 2026
Summary
The September 2026 release extends workflows to opportunities and customer service cases, so the same structured follow-through you use on client records now runs on deals and support requests. The Outlook add-in can now save calendar appointments to Maximizer with their attendees attached. Teams can also send from a shared inbox address without each person validating it, navigate Maximizer from the keyboard, and get email updates on the progress of their insurance data imports.
New Features
Workflows for opportunities and cases
Edition: Financial Services Edition +, Business+
Area: Web
What's new
You can now build workflow templates for Opportunities and Customer Service cases, then start them from either module on a single entry or on several entries at once. The Workflows screen has a new Entity filter so you can view workflows by module, and workflow cards and lists show the opportunity Objective or case Subject in the Regarding field.
In Financial Services Edition, Customer Service is called Client Service, and cases are called Client Service plans.
Why it matters
The repeatable steps your team follows to move a deal forward or resolve a client request can now live on the opportunity or case itself. Everyone works the same process, nothing gets skipped, and you can see at a glance which deal or case each workflow belongs to.
How it works
- Create or edit a workflow template and choose Opportunities or Customer Service in the Entity field. Each template's entity appears in the workflow templates grid.
- In the Opportunities or Customer Service module, select Start a workflow from the Actions menu or the Action panel. Select several entries first to start the same workflow on all of them. The picker only lists templates built for that module.
- Open the workflow card in the Overview tab or the Workflows tab. The Regarding field shows the opportunity Objective or the case Subject.
- On the Workflows screen, use the Entity filter to narrow the list to one module. The Workflow drop-down and the Regarding column update to match.
Note: Opportunity and case workflows are started manually for now. Set up Automation remains available for Address Book and Contact List workflows, and automation for opportunities and cases is planned for a future release.
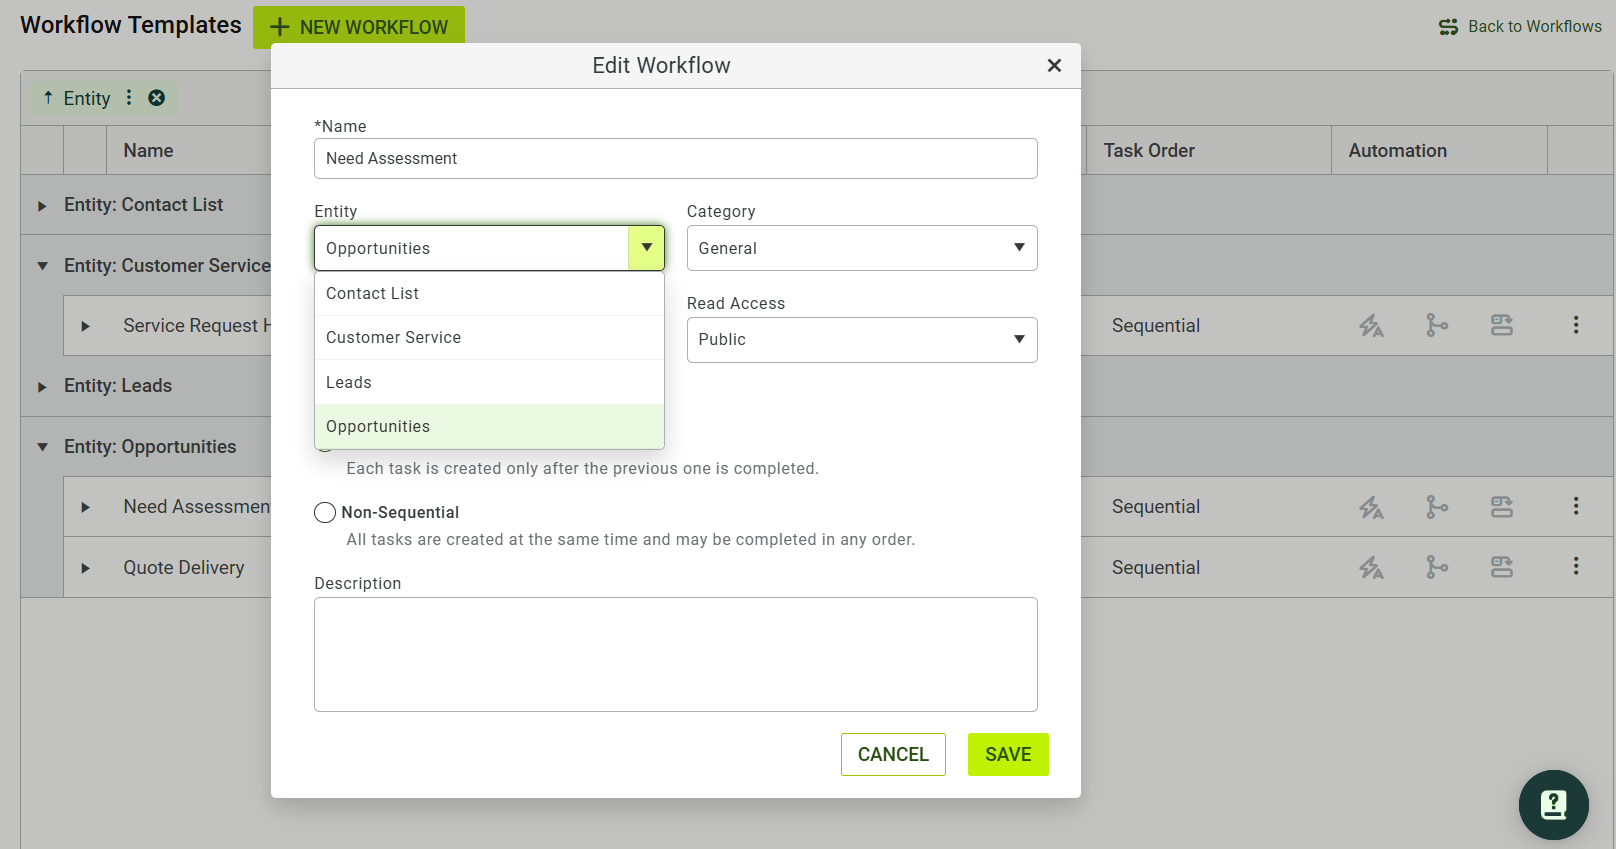
Choose Opportunities or Customer Service as the entity when you create or edit a workflow template
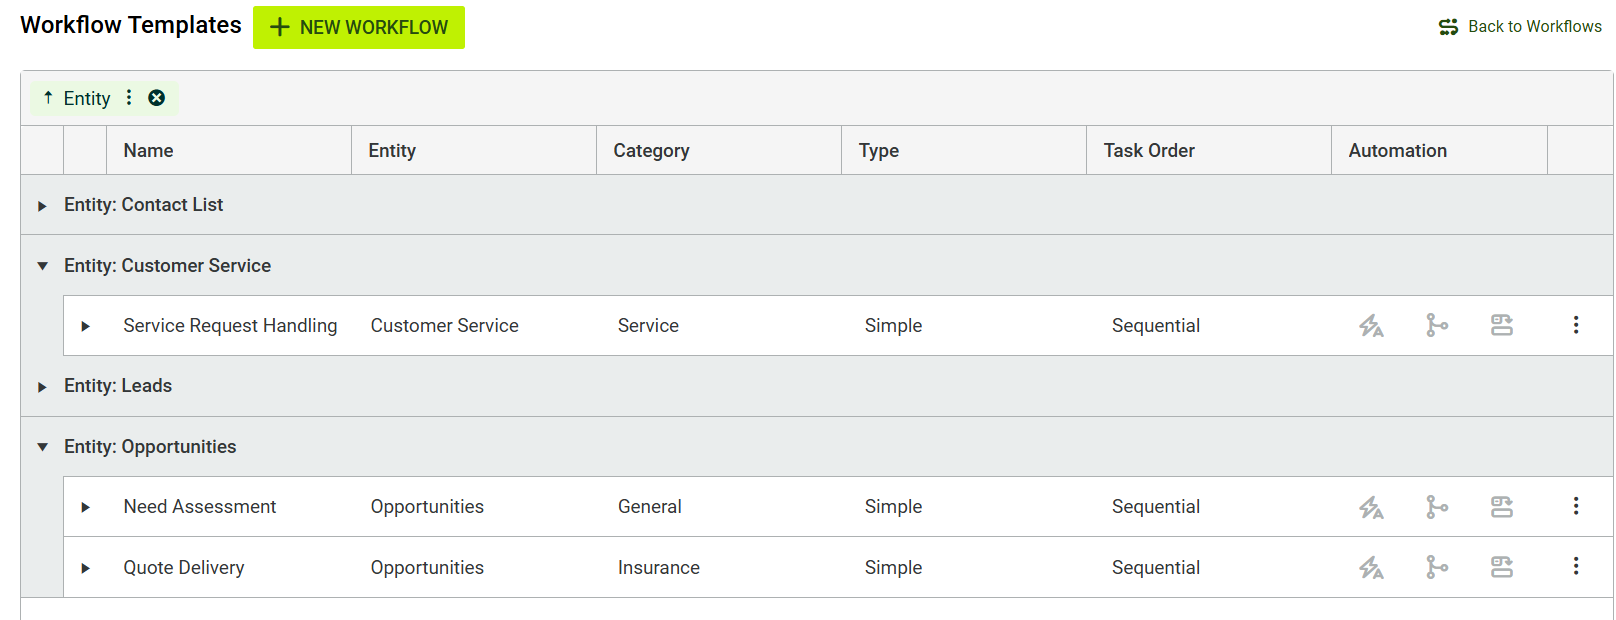
The workflow templates grid groups templates by entity
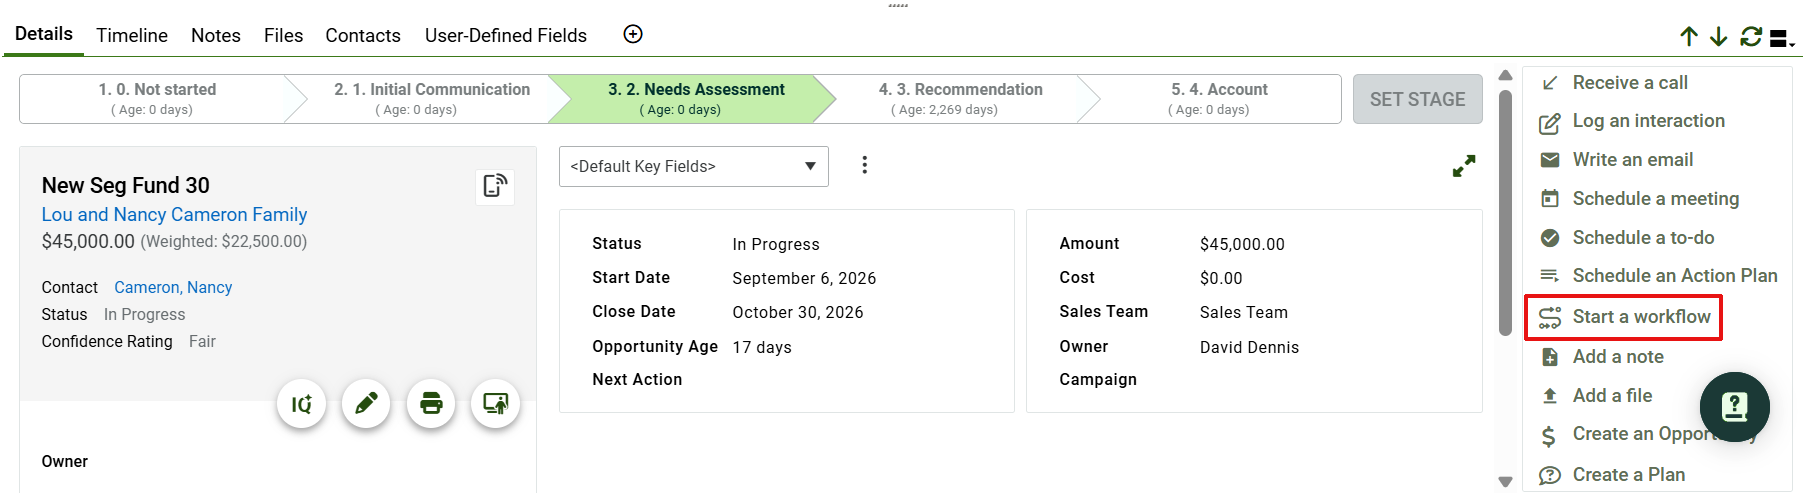
Start a workflow from the Action panel on an opportunity
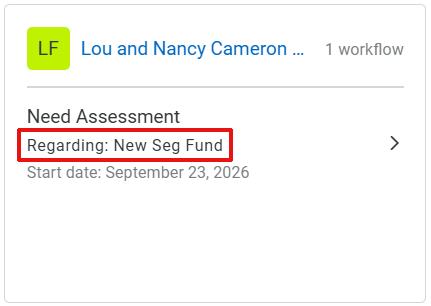
The workflow card shows which opportunity the workflow is regarding
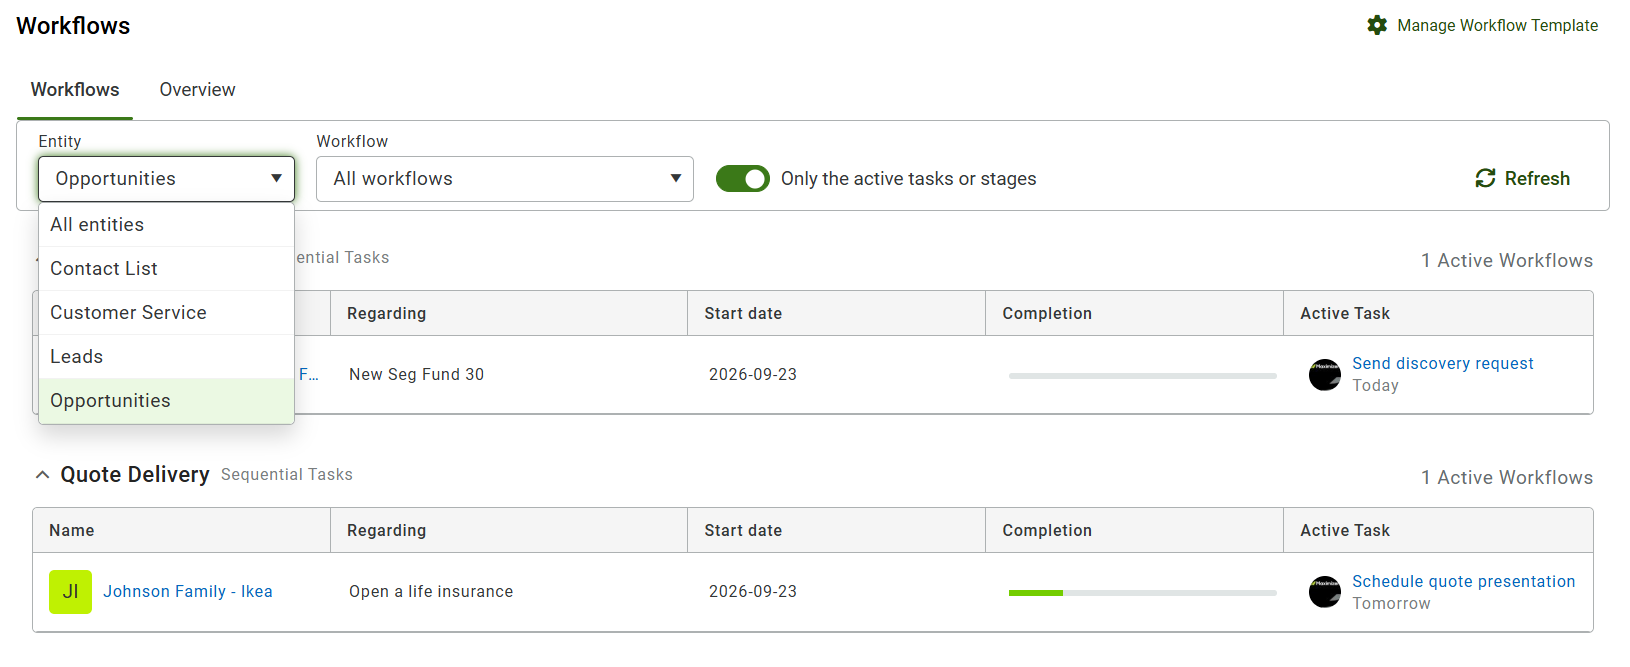
Filter the Workflows screen by entity to see only opportunity or case workflows
Maximizer CRM for Outlook: save appointments to Maximizer
Edition: All Editions
Area: Outlook
What's new
You can now save an Outlook calendar appointment to Maximizer from the Outlook add-in. The appointment carries over the event details and links any attendees who already exist in Maximizer. For this release, the manual save works only when automated Calendar sync is turned off, so choose the approach that suits how you work.
Why it matters
Client meetings booked in Outlook reach Maximizer without anyone typing them in twice. You decide which appointments belong in the CRM, and the right people are attached to each one.
How it works
- In the Outlook add-in, open the menu and select Data sync settings > Calendar sync.
- Make sure Calendar sync is turned off.
- Open an Outlook calendar event and select Save appointment.
- Maximizer creates the appointment from the event details, links matching attendees, and shows it in the Timeline right away.
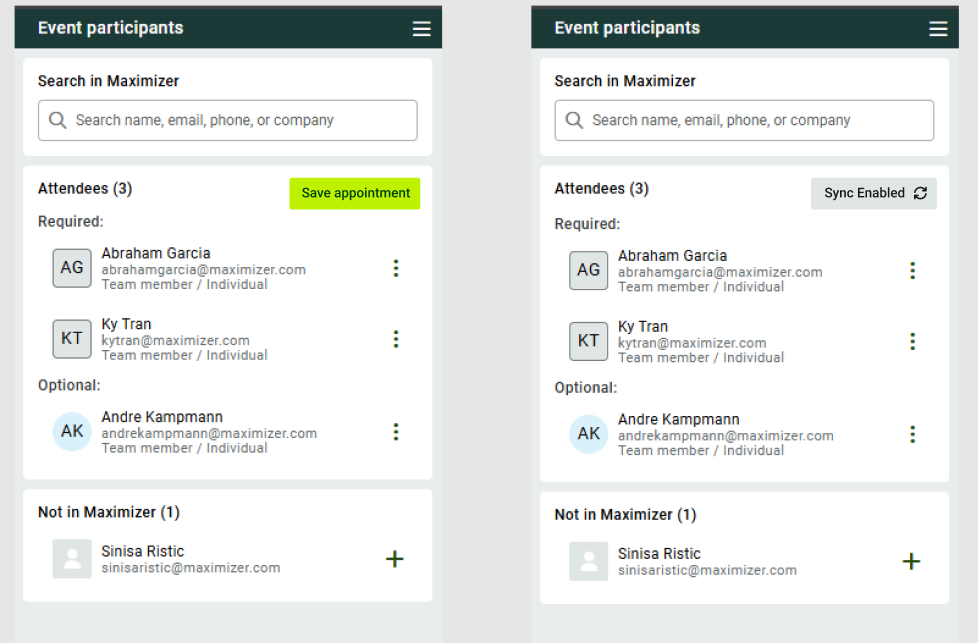
Save appointment appears when Calendar sync is off (left); with sync on, the add-in shows Sync Enabled instead (right)
Improvements
Shared email addresses for Email 2 and Email 3
Edition: All Editions
Area: Web
What has changed
You can now use a shared or group address, such as info@ or support@, as the Email 2 or Email 3 in your User Profile. Once one user has validated a shared address, other users can add it without validating it again. Email 1 stays unique to each user, must be validated individually, and cannot be used by anyone else as their Email 2 or Email 3.
Why it matters
Your team can send from a common inbox address with one validation instead of one per person. Client communication goes out from a consistent address, and admins and users spend less time on setup.
How it works
- Open your User Profile and enter an address in the Email 2 or Email 3 field.
- If another user has already validated the address, it is ready to use right away. If not, complete the standard validation, after which the address is available to other users without further validation.
- When composing an email, select the shared address as the From address.
If the address is already another user's Email 1, it cannot be saved, and a message explains why.
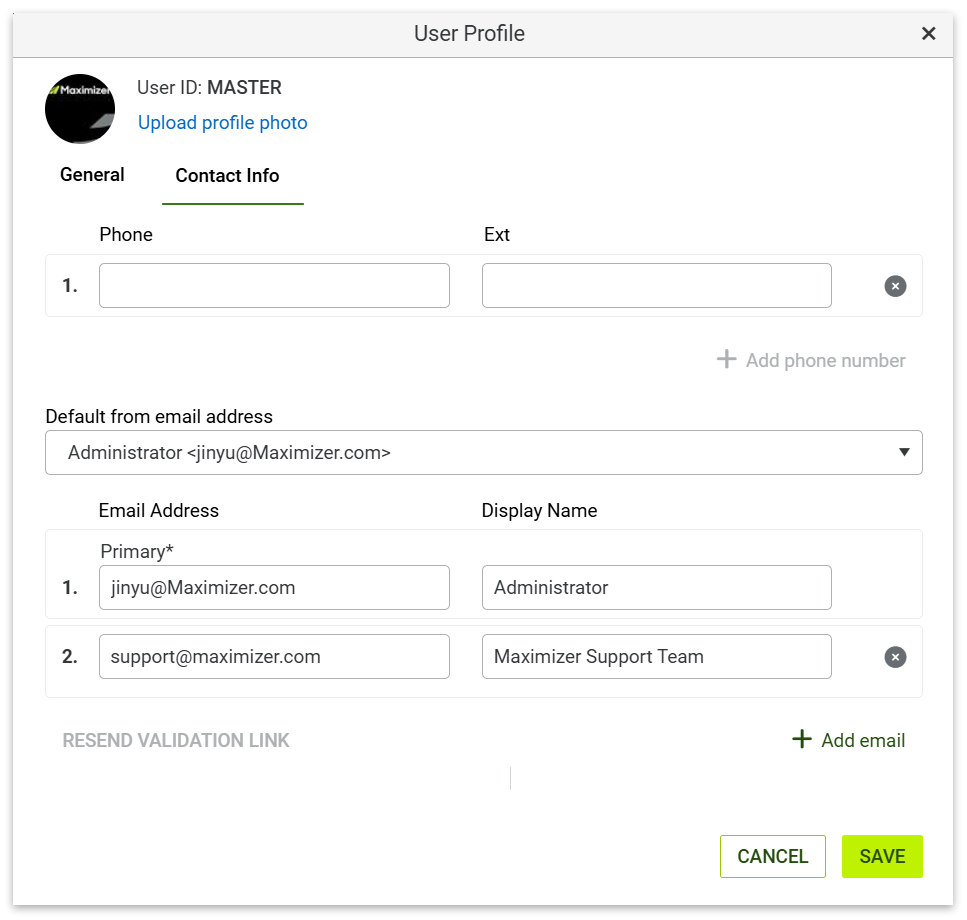
A shared support address added as Email 2 in the User Profile
Keyboard shortcuts for navigation
Edition: All Editions
Area: Web
What has changed
You can move between the main areas of Maximizer and edit records from the keyboard.
Why it matters
Keyboard navigation makes Maximizer faster for power users and more accessible for anyone who relies on a keyboard instead of a mouse.
How it works
Navigation:
- Alt + Shift + B: Address Book
- Alt + Shift + C: Calendar
- Alt + Shift + O: Opportunities
- Alt + Shift + L: Leads
- Alt + Shift + S: Customer Service
- Alt + Shift + H: Hotlist
- Alt + Shift + T: Tasks
- Alt + Shift + W: Workflows
- Alt + Shift + Q: Target
- Alt + Shift + I: Company Library
- Alt + Shift + P: App Directory
- Alt + Shift + R: Activity Tracker
- Alt + Shift + U: AI Hub
- Alt + Shift + Y: My Work Day
- Alt + Shift + V: Dashboard
- Alt + Shift + F: Knowledge Book
- Alt + Shift + Z: Campaigns (Legacy)
Details tab:
- Ctrl + Shift + E: Edit
- Ctrl + S: Save
- Alt + Shift + X: Cancel
Insurance Data Hub: import status emails
Edition: Financial Services Edition +
Area: Web
What has changed
Insurance Data Hub now emails you at each key stage of an insurance data import: when your data has been received and the import has started, when your policies have been imported, and if an issue stops the import from completing.
Why it matters
You always know where your insurance data stands, whether it is still processing, ready to view, or waiting on a follow-up from Maximizer, so you are never left guessing why policies have not appeared yet.
How it works
- Upload your insurance data from Insurance > Manual import.
- You receive an email confirming your data has been received and the import is underway.
- When the import finishes, you receive a confirmation with the carrier, the number of policies imported, and the import date.
- If the import runs into an issue, you receive an email confirming that Maximizer has been notified and will follow up with next steps.
If you need assistance, contact support@maximizer.com