
New Timeline
The Timeline allows users to view the history of interactions and communication with customers. The improved Timeline now enables users to view overdue and future activities, providing a 360-degree view of all interactions - past, present, and future.
Historical data records what has happened with a customer, while future activities serve as leading indicators for sales leaders to assess account health. An account with no scheduled future activities suggests a lack of customer relationship-building, potentially putting it at risk. Sales leaders can review upcoming customer discussions with account managers, offering suggestions and coaching. They can also check for overdue tasks, ensuring no critical responsibilities are overlooked.
The changes in the Timeline tab include:
- Add Upcoming and Overdue sections to display future and overdue appointments and tasks.
- Provide a grid view to display more data at a glance.
- Include an Actions panel to make the Timeline tab consistent with other tabs.
- Allow filtering items by interaction categories.
- Open the associated entries, allowing users to view all relevant data without leaving Timeline.
Timeline view
Users will see the historical data grouped by months. Use the Show All option to view interactions with other contacts in the same company.Clicking the name of an Address Book entry or associated opportunity or case opens a pop-up to show the details of the entry. This allows users to view all the relevant information without leaving the tab.
The Upcoming and Overdue section displays tasks and appointments in chronological order. Overdue activities appear at the top of the list, followed by future activities. If Show All option is on, users can see all the overdue and future activities with all contacts from the same company. Upcoming and Overdue section will be collapsed by default.
Grid view
Use the switch on the right to change to grid view. This view displays data in columns. Clicking on subjects opens a dialog showing interactions, notes, emails, appointments, and tasks. Clicking on the name of an Address Book entry, opportunity, or case opens a pop-up dialog with details of the associated entry. Users can resize column width and reorder columns by drag and drop. The settings will be remembered automatically.The grid view also includes Upcoming and Overdue section.
When one or multiple items are selected, the Delete button will appear. Users can delete multiple items at the same time.Clicking the Filters button will expand the header bar and show the filter fields. Users can filter items by Users, Types and Interaction Categories.
Use the search field to quickly find items.
Timeline in other modules
The updated Timeline tab is available in Address Book, Opportunities, Customer Service, Leads, and Hotlist module.
Timeline tab in Opportunities:Users can view the timeline of an opportunity or include the interactions with the associated Address Book entries in the timeline.
Timeline widget in Lead Details screen:
Timeline in the pop-up for displaying entry details:
Upgrade experience
Users who are using the Timeline tab will see the new Timeline tab automatically. Users who are currently using the Interactions or Activities tabs are encouraged to try the new Timeline and familiarize themselves with its functions. The Interactions and Activity tabs will be deprecated in the future. Timeline will be the centralized place to view all customer interactions.
Refreshing new UI
In the latest update for our product, we have introduced a polished user interface. Designed with a focus on simplicity and elegance, the new UI offers a clean and modern look that enhances user experience. Existing users will appreciate the refreshing change, while the contemporary design is poised to attract new customers.
New deletion confirmation
To prevent users from deleting the wrong entries, when an entry is selected for deletion, its name is displayed in the title of the deletion confirmation pop-up.
If multiple entries are selected, the number of the selected entries is displayed in the Delete button.
This change is implemented in Address Book, Opportunities, Customer Service, Leads and Campaigns modules.
Copy partner to opportunity when converting a lead
When converting a lead with an assigned partner into an opportunity, the partner will automatically be copied to that opportunity. In previous releases, partners were only copied to Address Book entries.
Allow partial search when searching for an Address Book entry
In the previous releases, searching for Address Book entries in the Select Entry dialog must enter complete phrases. For example, when searching "Sunrise Adventure," typing only "Sun" won't return any results. You must either enter "Sunrise" or use wildcard characters - a feature many aren't familiar with. Now, you will see the matching entries while you are typing.
The feature is available in following places:
- Opportunity details - Assign a company, a contact, partners and competitors.
- Case details - Assign a company, a contact Address Book entry details - Assign a partner.
- Lead details - Assign a partner.
- Address Book global search and default entry - Assign a partner.
- Task dialog - Assign an Address Book entry.
As you type in the search field, matching entries appear in the table below:Continue typing narrows down the results, showing only the matching entries:
You can search for specific entries by combining both contact name and company name:
When assigning a partner or a competitor in an opportunity, all partners or competitors will be loaded by default when the dialogue opens. You can enter search text to find a particular partner.
View entry details from pop-up
In many places, you can view entry information in a pop-up. For instance, in the Tasks module, you can preview Address Book entries in a pop-up with three tabs. While these tabs offer a quick overview, they don't show all the details. For complete information, you can now click the "Show all details" button to add the entry to the corresponding module and view the full details.
Support "ignore year" option in lead search
As a financial advisor, you can nurture leads by sending them birthday cards. While this wasn't possible before, the new "Ignore year" option now lets you search leads by their birth date, making it easy to find leads based on their birthday.
Note: To search for leads, open the drop-down menu in the Leads module and select Advanced Search.
You can use the "Ignore year" option when searching any date field.
Option to show password in Login page
You can now preview your password before logging in by clicking the show/hide button in the Password field.
Maximizer for Outlook now available for on-premise Customers
The modern Maximizer CRM for Outlook integration is now officially available for on-premise deployments starting with version R26. This add-in brings streamlined access to CRM data from within Outlook enhancing productivity for on-premise users while maintaining security and deployment control.
Key Features:
- View CRM contact, opportunity, and activity details directly in Outlook.
- Save emails to Maximizer and create new contacts, leads, companies, opportunities or cases from emails.
- Add tasks, appointments, notes, and call interactions to Maximizer without leaving Outlook.
- Search and add Maximizer entries as email recipients.
- See a timeline of past interactions and stay up to date on upcoming activities.
Note: Sync capabilities (contacts, appointments, emails, tasks) are not supported for on-premise environments, including "Send and Save" and "Email Auto-save" functionality as they require Email Sync to be enabled.
Maximizer CRM for Outlook for On-Premise Setup
Zapier integration with configurable cycle frequency
On-premise administrators can now configure the polling frequency for the Zapier integration directly through a server-side settings file. This gives IT teams more control over how often Zapier checks for new data from Maximizer, enabling optimization based on the performance capacity of their local environment. This allows improved integration responsiveness for mission-critical workflows.
Note:
- Default polling behavior remains unchanged unless explicitly configured.
- This enhancement does not apply to Maximizer CRM Live, where polling frequency is centrally managed.
- A user guide is available with step-by-step instructions for updating the config file.
Other Enhancements
Appointment description is not displayed calendar daily and weekly views
Appointment description has been removed from daily and weekly views.
Filters settings for Activity Tracker are persistent
The filter settings in the Activity Tracker module are saved automatically. When you change these settings, they will persist the next time you log in.
Increase character limit for the Description field in Opportunities
The limit has been increased from 508 to 9215 characters.
Mobile
Create new Address Book entries by taking a picture or uploading a photo
In the Address Book screen, tap the plus button to open the manual. You can either take a picture or upload a
photo from your gallery.
The system determines the entry type based on the retrieved data: it creates a company entry if only a company name is detected, an individual entry if first and last names are detected, or a contact entry if first name, last name, and company are all detected.
When saving a contact, the app checks if the associated company exists. If it doesn't, the app automatically creates the company before adding the new contact.
After meeting quick recap and follow up
As a busy salesperson visiting clients throughout the day, you need to handle several post-meeting tasks: entering meeting notes, creating follow-up tasks, and scheduling the next meeting. For meetings about opportunities or service cases, you'll also need to update those records. The new checklist helps you complete these after-meeting tasks efficiently while on the move.
You can manage your meetings in the Today's Business screen. After a meeting time has passed, a "Recap and follow-up" indicator appears, reminding you to complete the post-meeting tasks. Tapping the meeting opens the appointment screen and displays an action panel.
Note: You can tap outside the panel to close it and view meeting details. You can always re-open the panel.
The action panel offers these functions:
- Add a note - Meeting information is automatically added to the note. You can type content or use voice-to-note function.
- Add task - A simplified Add Task screen appears for quick task creation. For access to all fields, tap the "Show More Fields" button.
- Add Appointment - Opens a simplified Add Appointment screen for quick scheduling. Meeting details like attendees and related opportunities or cases are automatically copied. For access to all fields, tap the "Show More Fields" button.
Completed tasks are marked with checkmarks. You can close the panel and return later to see which tasks are finished and which remain.
For meetings involving opportunities or cases, you'll see buttons to update these records. For example, if a meeting involves an opportunity, you can update the close date, or the expected revenue based on the discussion in the meeting.
Once you've completed all required tasks, tap the "I am done" button to close the panel. When you return to the Today's Business screen, a checkmark will indicate that you've completed the after-meeting workflow.
Note that you can tap the "I am done" button at any time. You don't always need to complete every task. For instance, if you don't know when the follow-up meeting will be scheduled, you can skip the Add Appointment step and tap "I am done" to complete the process.
UI polishing in Appointment and Task screen
Appointment screen
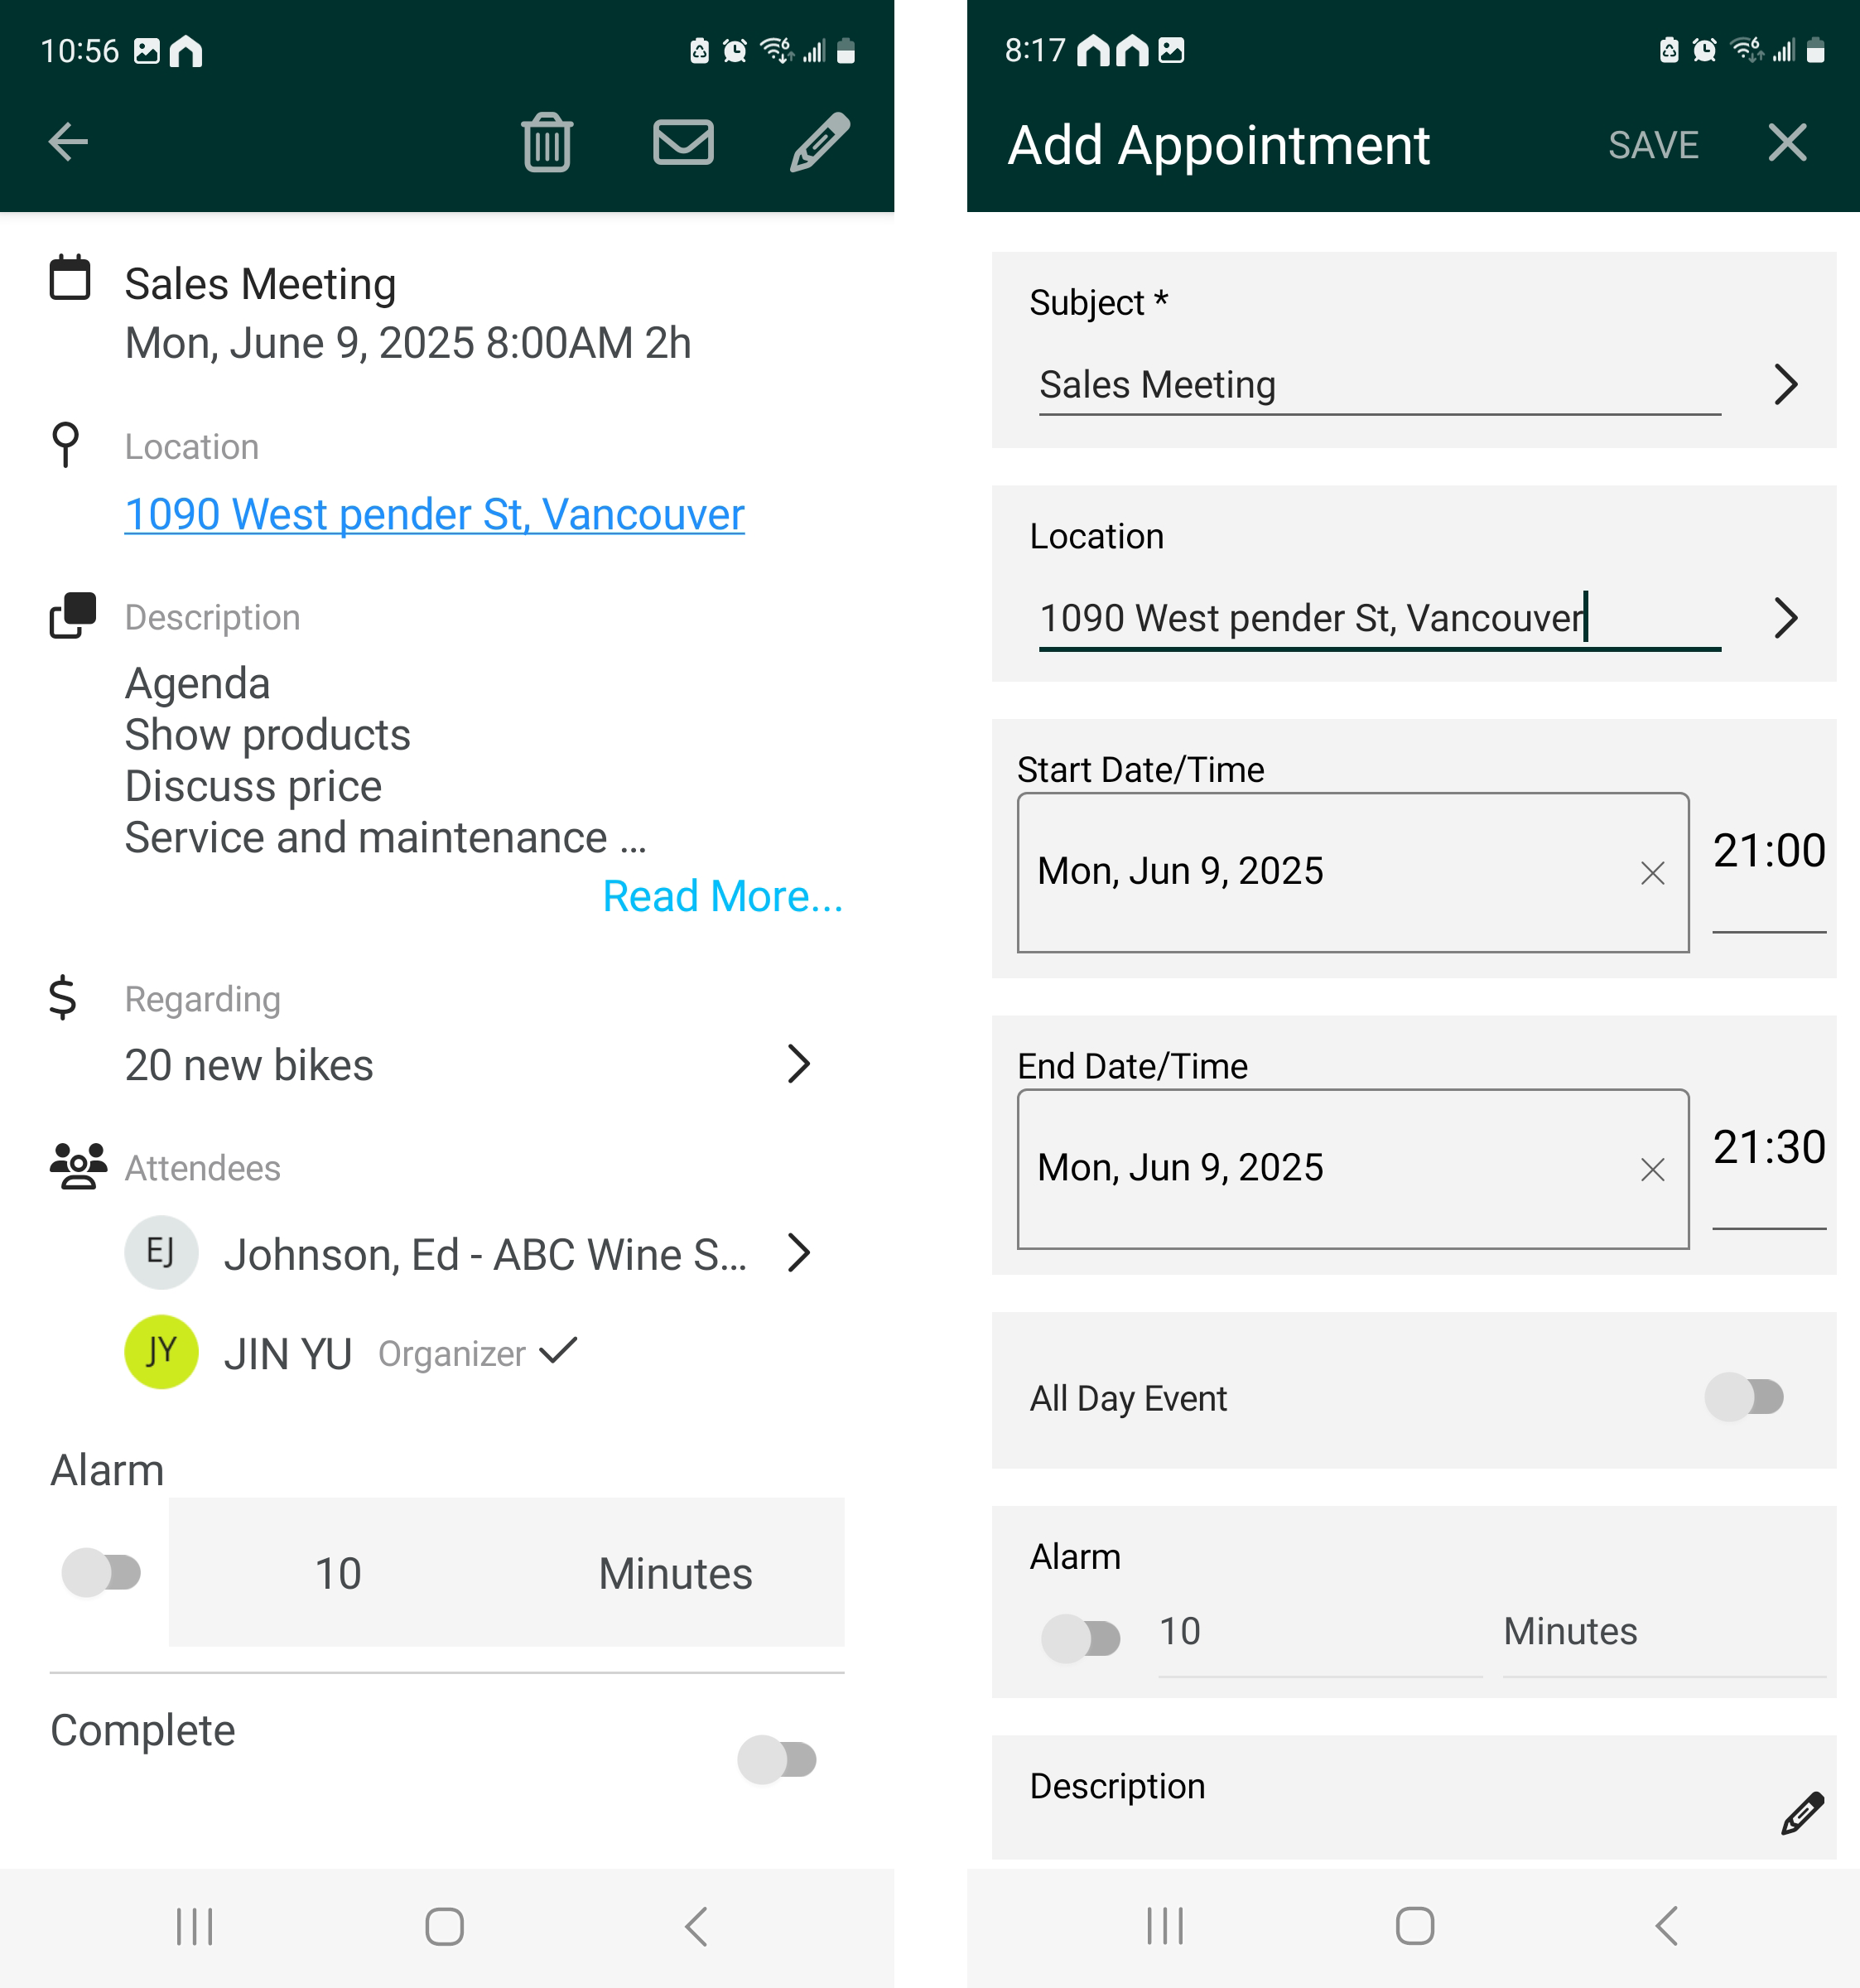
The Appointment screen's interface has been refined with consistent typography and spacing throughout. Associated Address Book entries, opportunities, and cases now clearly indicate they are tappable for viewing details. For Description fields with more than 4 lines, a "Show More" button reveals the full text.
In the Add Appointment screen, you can now enter addresses directly in the Location field. The Description field has moved to the top of the screen, while less frequently used fields appear at the bottom. The "Ignore Conflict" option appears only when conflicts arise during appointment saving.
 Task screen
By default, tasks are created without a specified time. The "Ignore conflict checking" option remains hidden until conflicts arise during task saving.
Use voice to quickly enter notes
While walking and using the mobile app, typing can be challenging. You can now use the voice-to-text function to enter notes by simply tapping the microphone button and speaking. Your voice will be automatically converted to text. This feature works for both after-meeting notes and regular note creation.
Improved appointment email
The email button has been moved to the header bar in the Appointment screen. This allows you to quickly send emails to meeting attendees. You can use it to inform them about updated meeting agendas, notify them if you're running a few minutes late, or send thank-you messages after meetings.
Tapping the email button opens the Maximizer email compose dialog. Your Maximizer email signature is automatically added, and appointment attendees are placed in the Bcc field. You can edit the message, add attachments if needed, and send the email.
Quick actions are available for opportunities and cases
Quick action buttons are added into opportunities and cases for quickly logging phone calls and chats and sending email.
Share entries by URL
You can now share Address Book entries, opportunities, cases, or leads from your mobile device. Tapping the Share button copies the entry's URL to your clipboard. You can then paste this link into an email or chat to share it with other users.
When users click the link, a new browser tab opens. After logging in, they'll see the shared entry displayed.